📝 1 Jan 2023

Suppose we’re running Apache NuttX RTOS on Pine64 PinePhone…
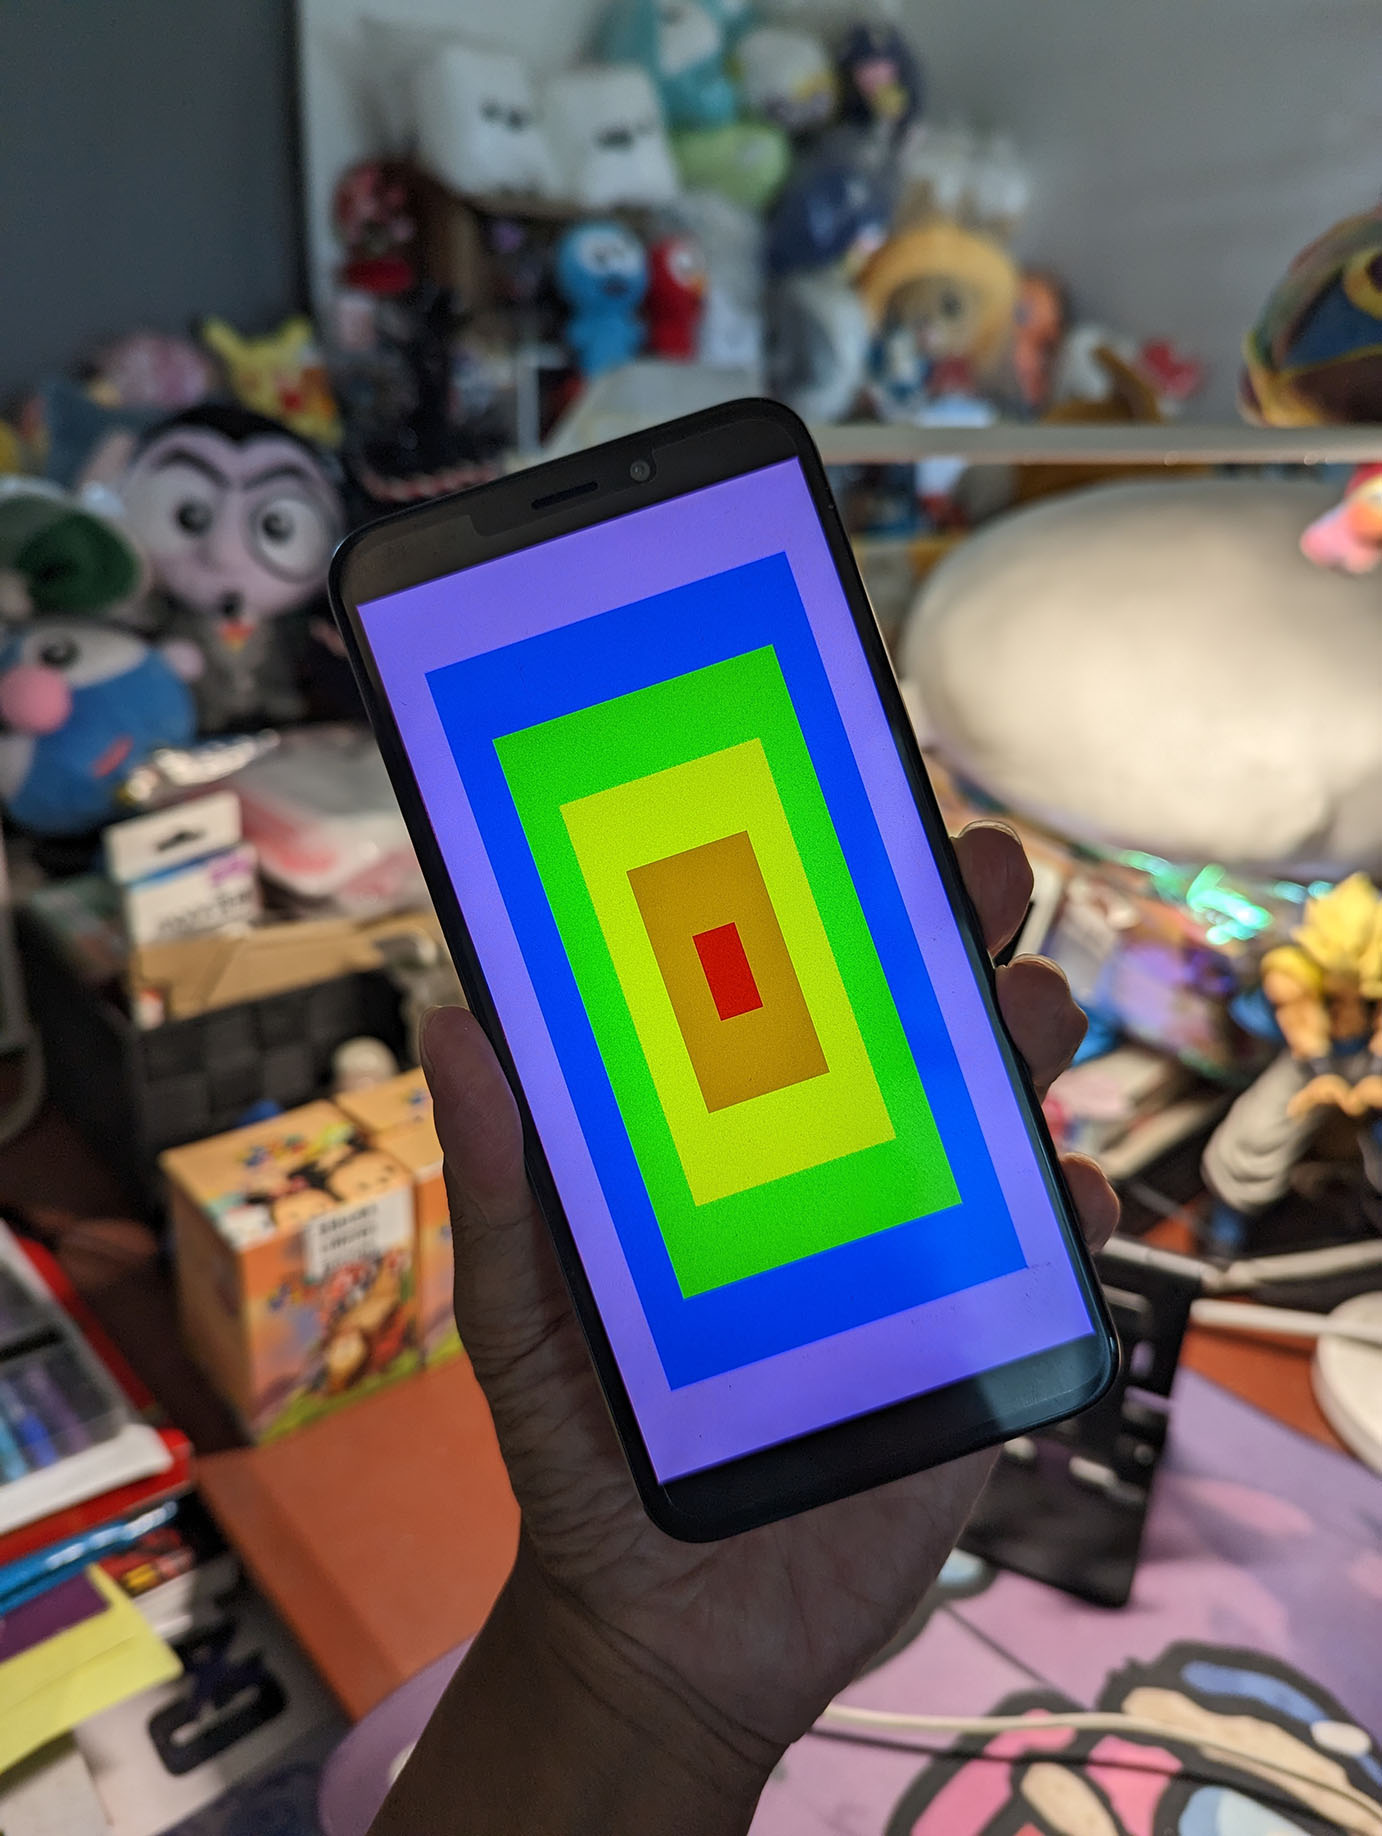
How will we create Graphical Apps for NuttX? (Pic above)
Today we’ll learn about the…
Framebuffer Interface that NuttX provides to our apps for rendering graphics
What’s inside the Framebuffer Driver for PinePhone
Mystery of the Missing Framebuffer Pixels and how we solved it (unsatisfactorily)
Creating NuttX Apps with the LVGL Graphics Library
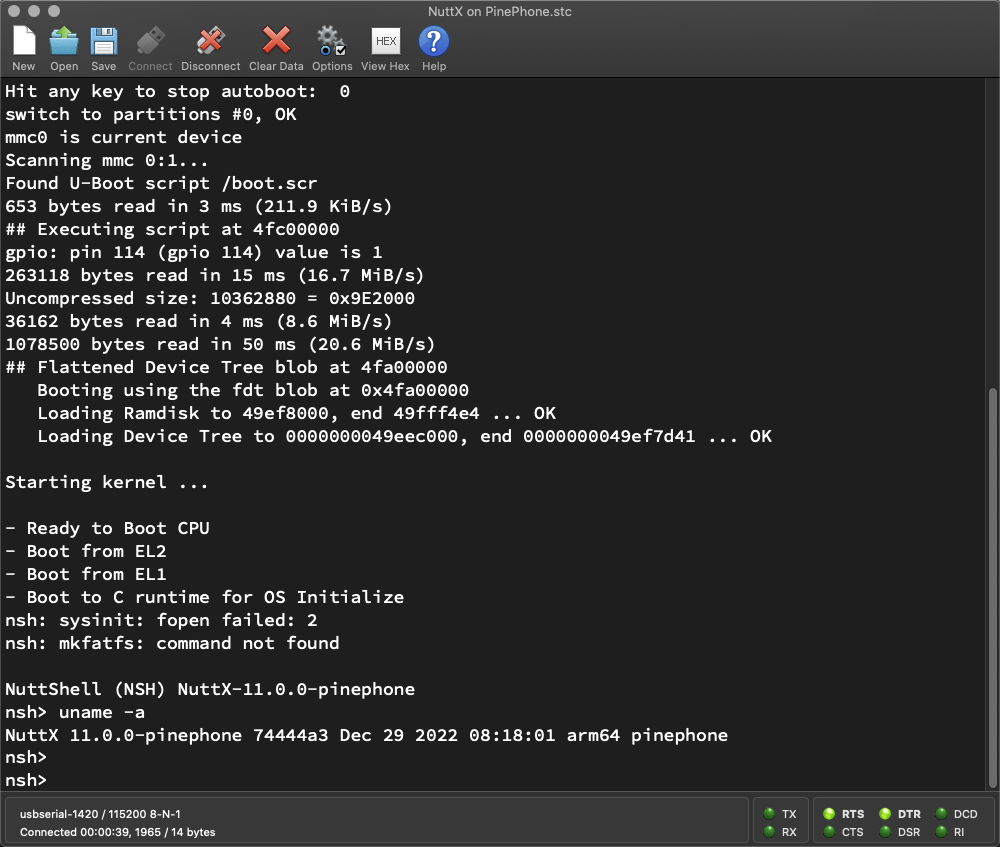
NuttX Framebuffer App running on PinePhone
Our Demo Code for today comes (mostly) from this Example App…
How do we build the app?
To enable the app in our NuttX Project…
make menuconfigAnd select…
Application Configuration > Examples > Framebuffer Driver ExampleSave the configuration and exit menuconfig.
Look for this line: apps/examples/fb/fb_main.c
#ifdef CONFIG_FB_OVERLAYAnd change it to…
#ifdef NOTUSEDBecause our PinePhone Framebuffer Driver doesn’t support overlays yet.
Then build NuttX with…
makeBefore we run the demo, let’s look at the code…
What’s inside the app?
We begin with the Framebuffer Interface that NuttX provides to our apps for rendering graphics.
To call the Framebuffer Interface, our app opens the Framebuffer Driver at /dev/fb0: fb_main.c
#include <nuttx/video/fb.h>
#include <nuttx/video/rgbcolors.h>

// Open the Framebuffer Driver
int fd = open("/dev/fb0", O_RDWR);

// Quit if we failed to open
if (fd < 0) { return; }
Next we fetch the Framebuffer Characteristics, which will tell us the Screen Size (720 x 1440) and Pixel Format (ARGB 8888)…
// Get the Characteristics of the Framebuffer
struct fb_videoinfo_s vinfo;
int ret = ioctl(          // Do I/O Control...
  fd,                     // File Descriptor of Framebuffer Driver
  FBIOGET_VIDEOINFO,      // Get Characteristics
  (unsigned long) &vinfo  // Framebuffer Characteristics
);

// Quit if FBIOGET_VIDEOINFO failed
if (ret < 0) { return; }(fb_videoinfo_s is defined here)
Then we fetch the Plane Info, which describes the RAM Framebuffer that we’ll use for drawing: fb_main.c
// Get the Plane Info
struct fb_planeinfo_s pinfo;
ret = ioctl(              // Do I/O Control...
  fd,                     // File Descriptor of Framebuffer Driver
  FBIOGET_PLANEINFO,      // Get Plane Info
  (unsigned long) &pinfo  // Returned Plane Info
);

// Quit if FBIOGET_PLANEINFO failed
if (ret < 0) { return; }(fb_planeinfo_s is defined here)
To access the RAM Framebuffer, we map it to a valid address: fb_main.c
// Map the Framebuffer Address
void *fbmem = mmap(  // Map the address of...
  NULL,              // Hint (ignored)
  pinfo.fblen,       // Framebuffer Size
  PROT_READ | PROT_WRITE,  // Read and Write Access
  MAP_SHARED | MAP_FILE,   // Map as Shared Memory
  fd,  // File Descriptor of Framebuffer Driver
  0    // Offset for Memory Mapping
);

// Quit if we failed to map the Framebuffer Address
if (fbmem == MAP_FAILED) { return; }
This returns fbmem, a pointer to the RAM Framebuffer.
Let’s blast some pixels to the RAM Framebuffer…
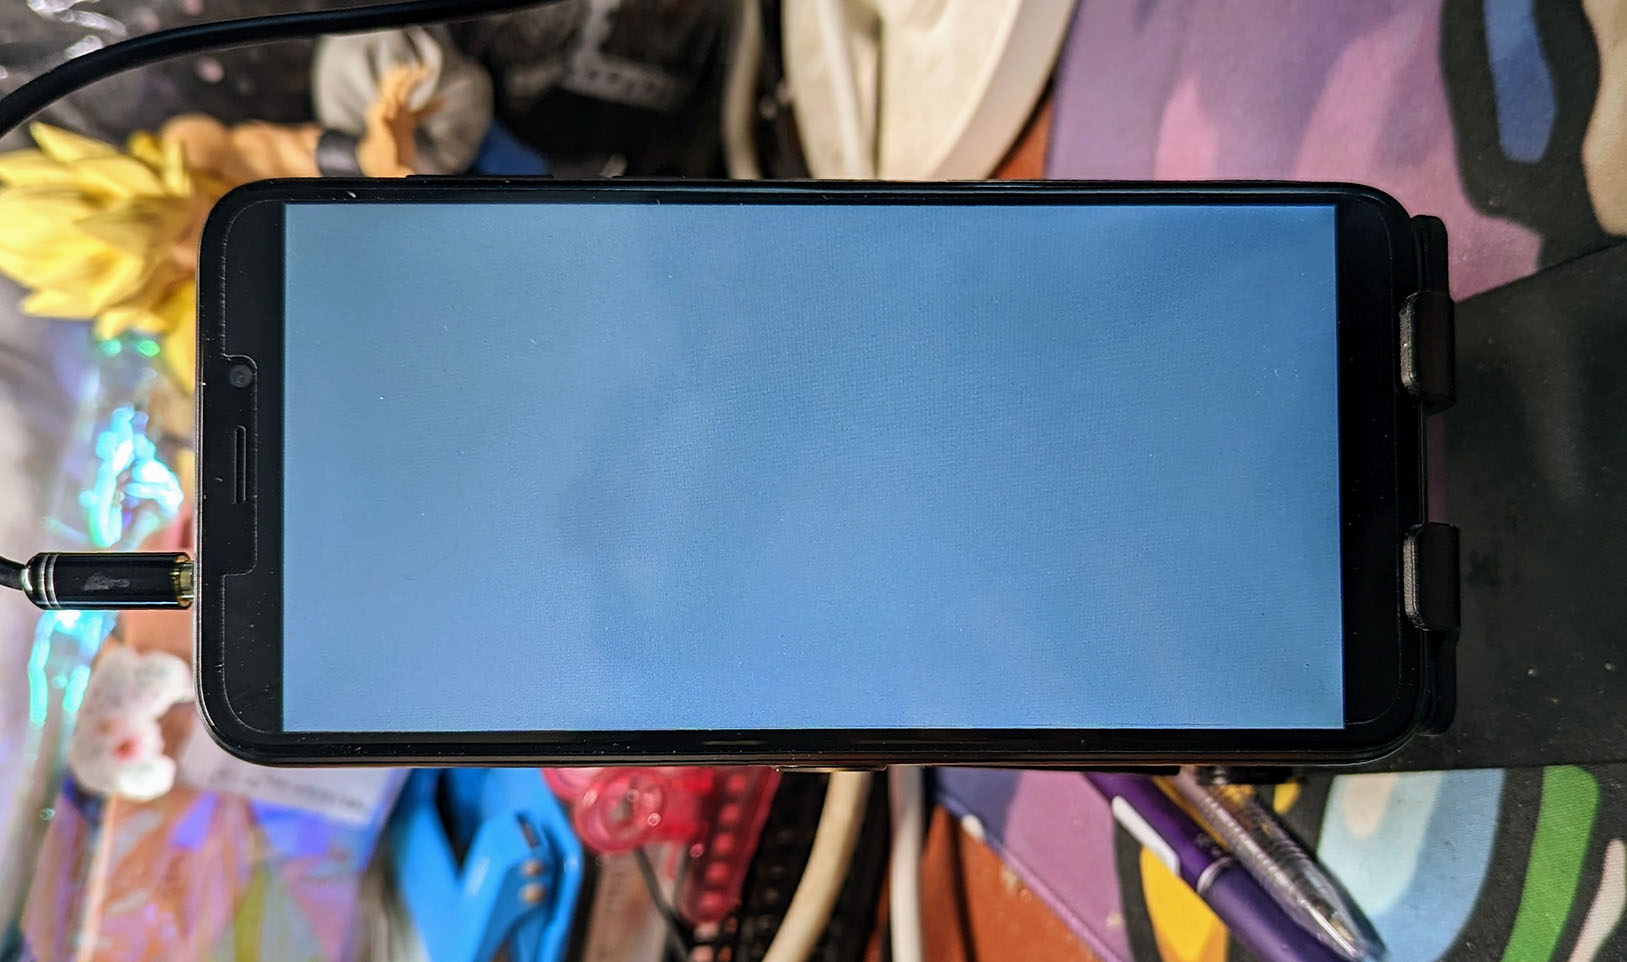
What’s the simplest thing we can do with our Framebuffer?
Let’s fill the entire Framebuffer with Grey: fb_main.c
// Fill entire framebuffer with grey
memset(        // Fill the buffer...
  fbmem,       // Framebuffer Address
  0x80,        // Value
  pinfo.fblen  // Framebuffer Size
);
(We’ll explain in a while why this turns grey)
After filling the Framebuffer, we refresh the display: fb_main.c
// Area to be refreshed
struct fb_area_s area = {
  .x = 0,  // X Offset
  .y = 0,  // Y Offset
  .w = pinfo.xres_virtual,  // Width
  .h = pinfo.yres_virtual   // Height
};

// Refresh the display
ioctl(  // Do I/O Control...
  fd,   // File Descriptor of Framebuffer Driver
  FBIO_UPDATE,           // Refresh the Display
  (unsigned long) &area  // Area to be refreshed
);If we skip this step, we’ll see missing pixels in our display.
(More about this below)
Remember to close the Framebuffer when we’re done: fb_main.c
// Unmap the Framebuffer Address
munmap(        // Unmap the address of...
  fbmem,       // Framebuffer Address
  pinfo.fblen  // Framebuffer Size
);

// Close the Framebuffer Driver
close(fd);
When we run this, PinePhone turns grey! (Pic above)
To understand why, let’s look inside the Framebuffer…
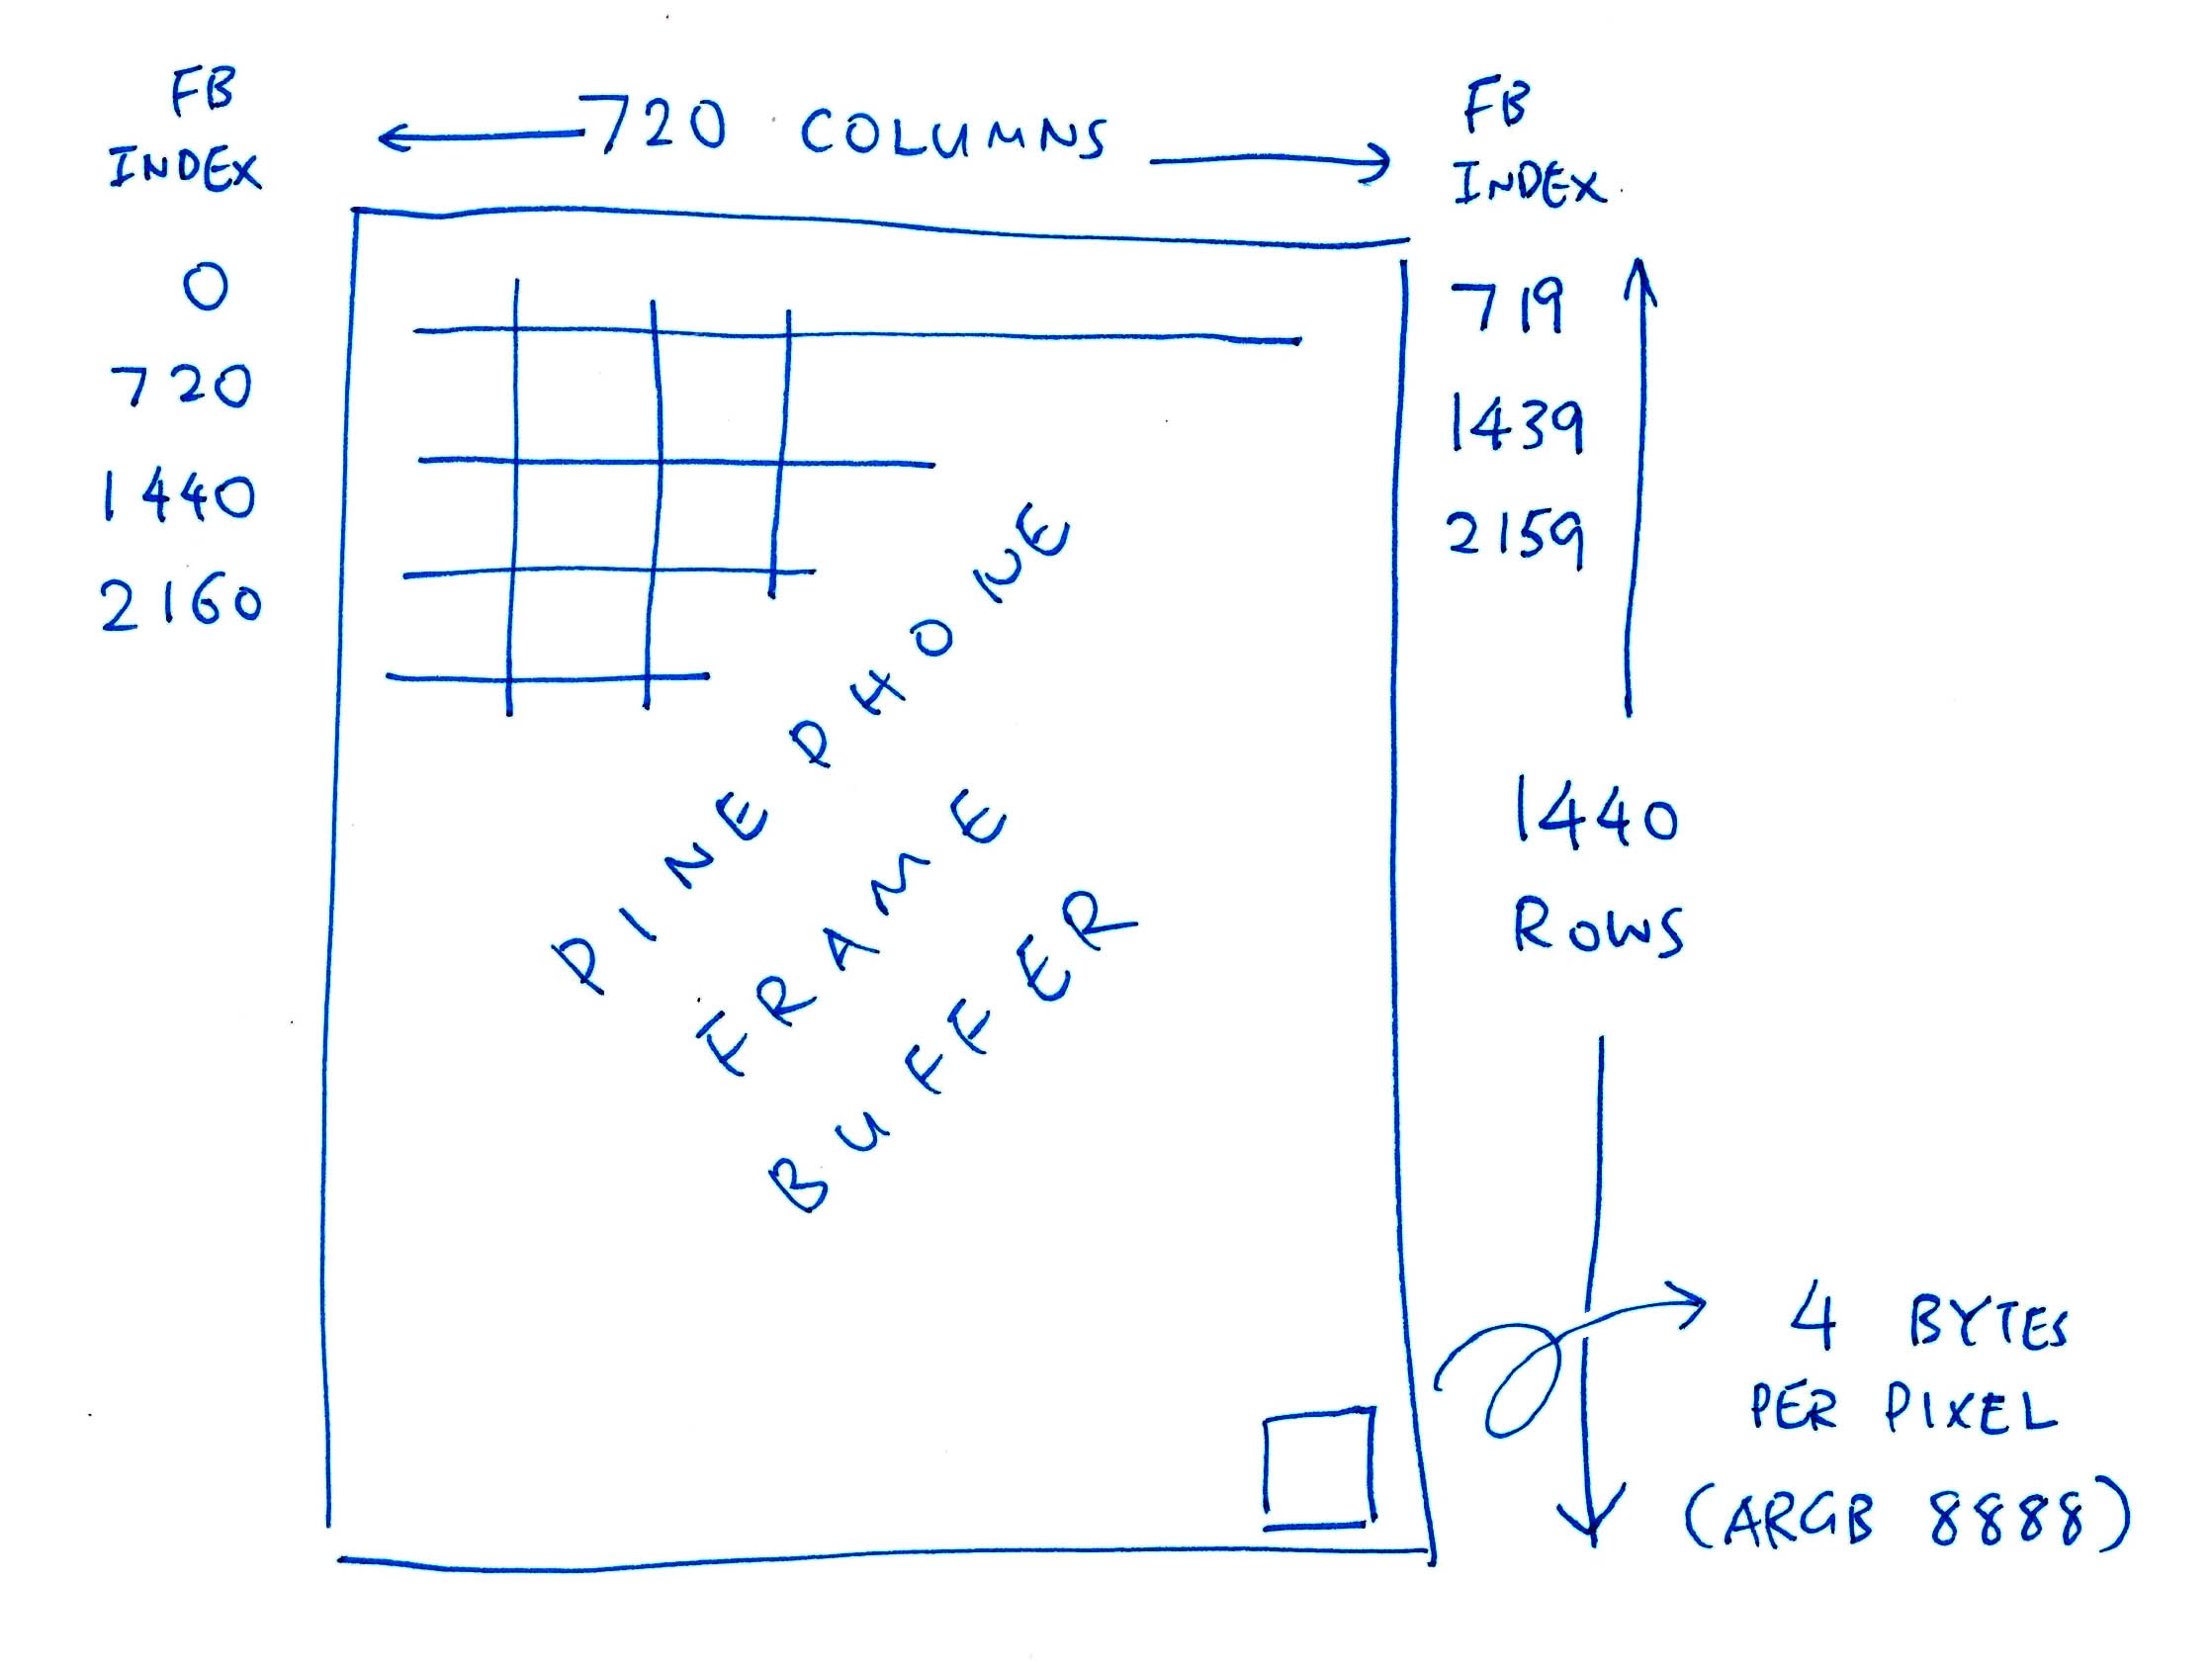
Why did PinePhone turn grey when we filled it with 0x80?
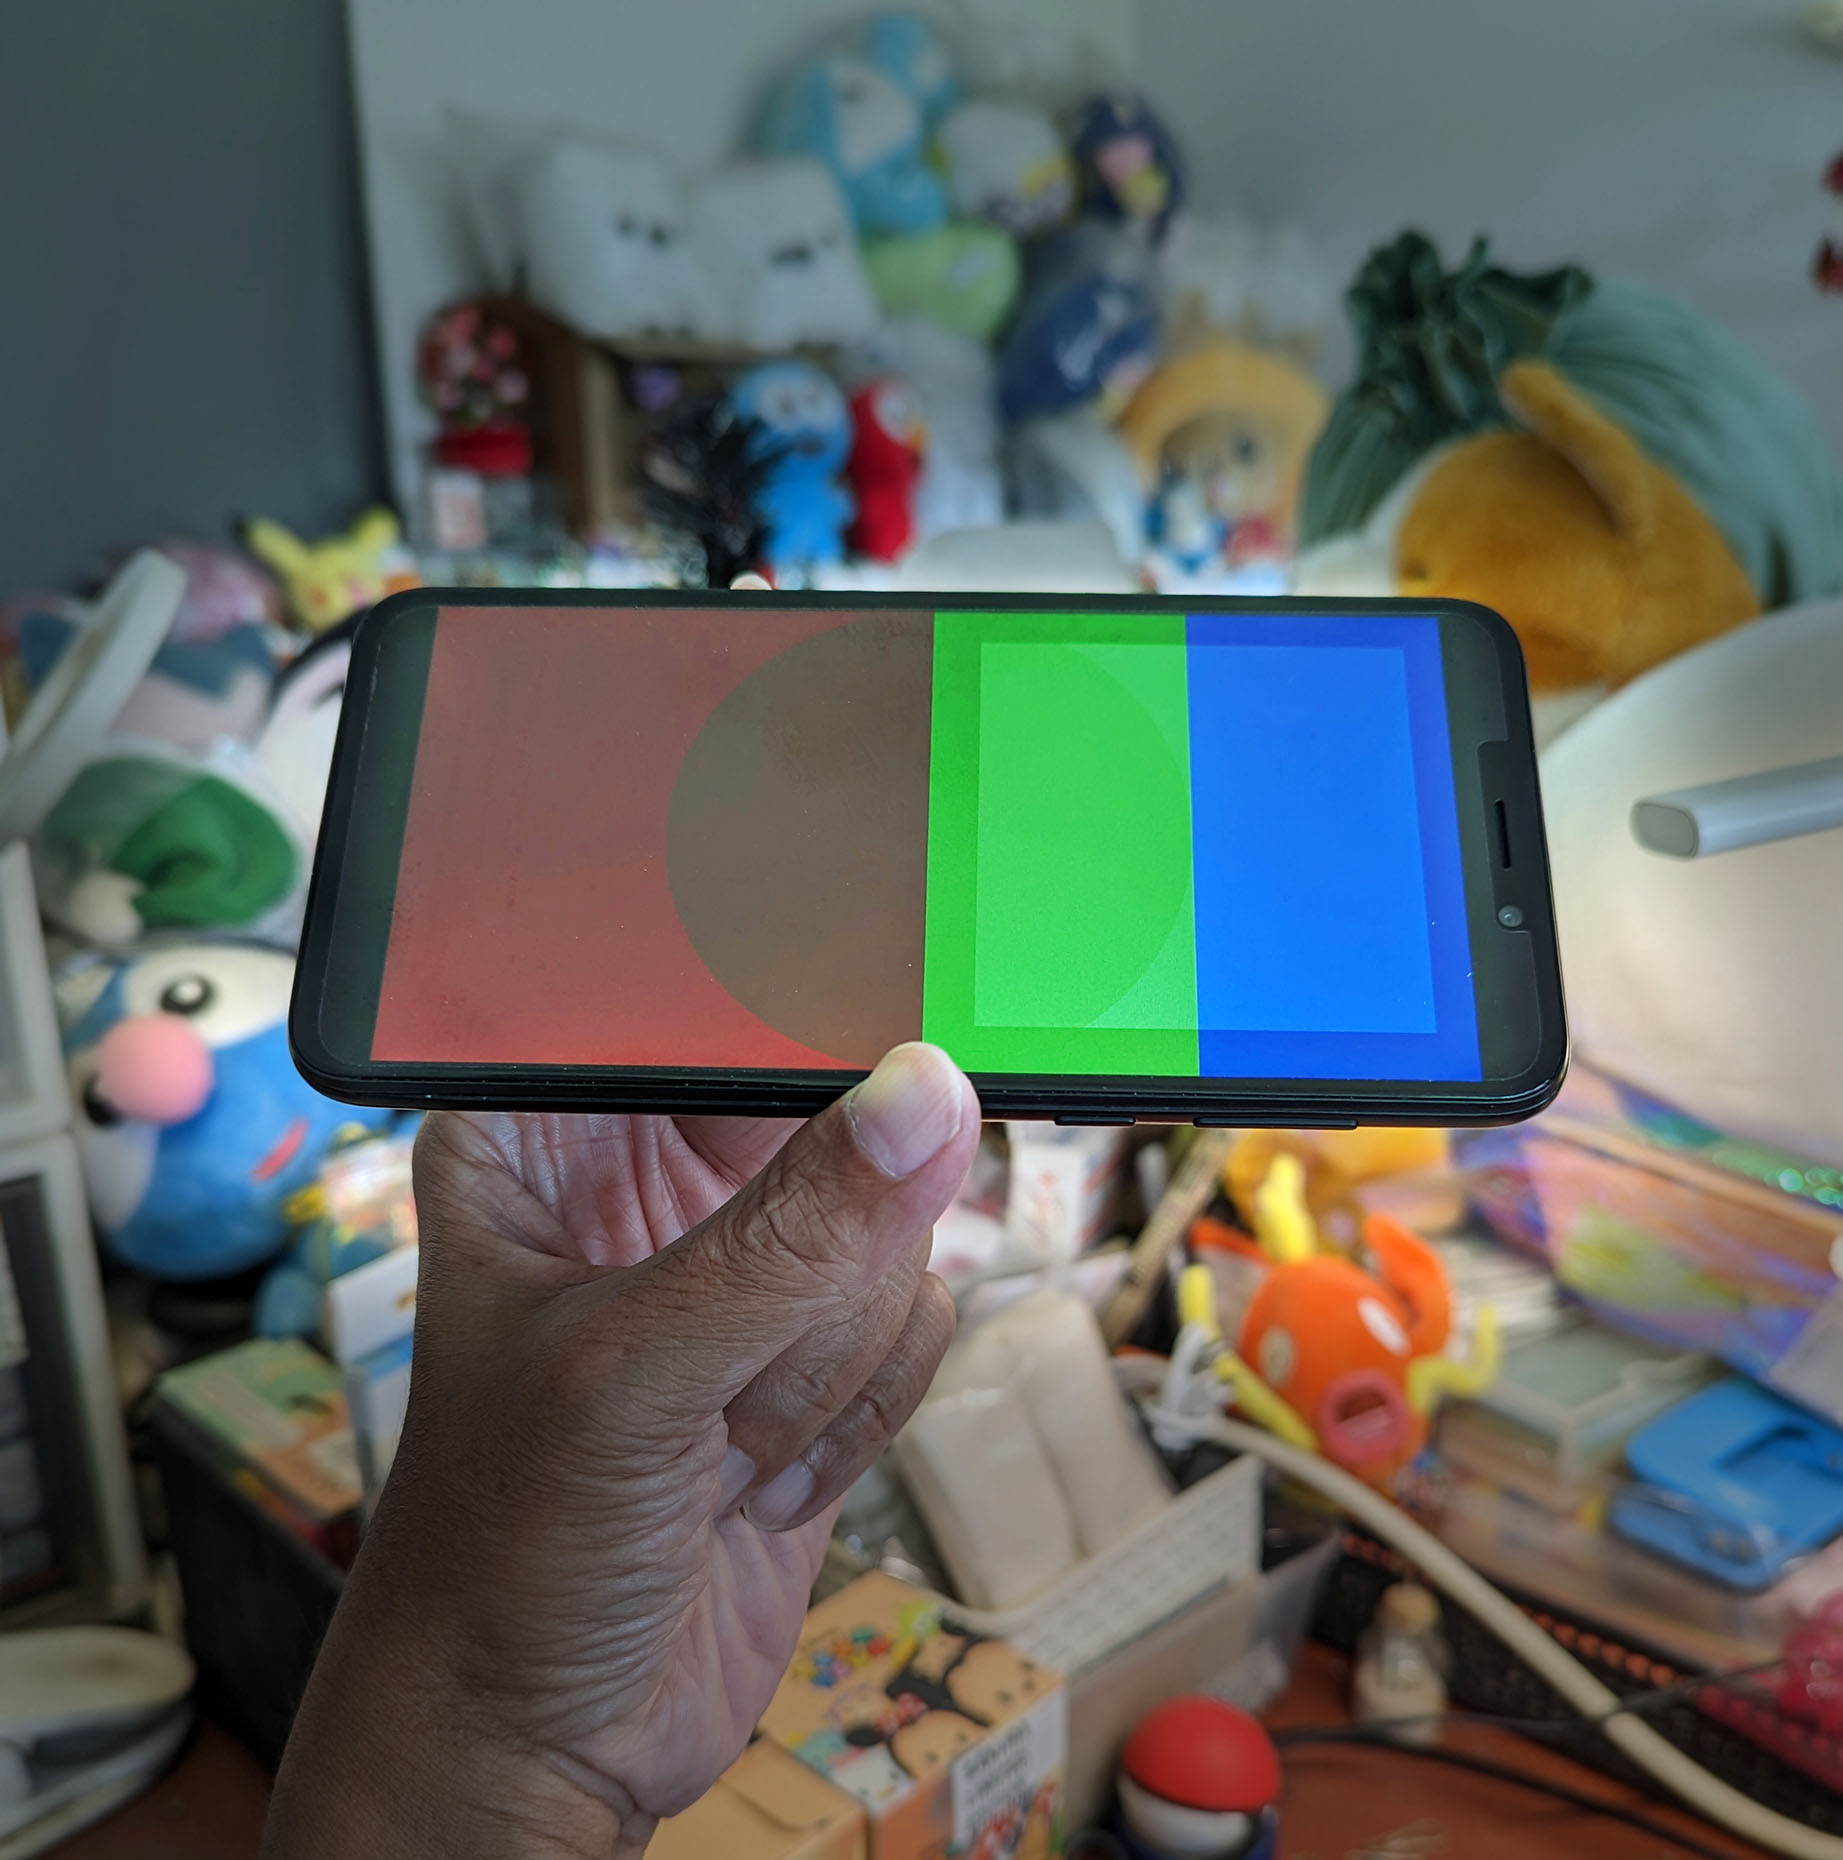
Our Framebuffer has 720 x 1440 pixels. Each pixel has 32-bit ARGB 8888 format (pic above)…
(Alpha has no effect, since this is the Base Layer and there’s nothing underneath)
When we fill the Framebuffer with 0x80, we’re setting Alpha (unused), Red, Green and Blue to 0x80.
Which produces the grey screen.
Let’s do some colours…
(Alpha Channel looks redundant, but it will be used when we support Overlays)
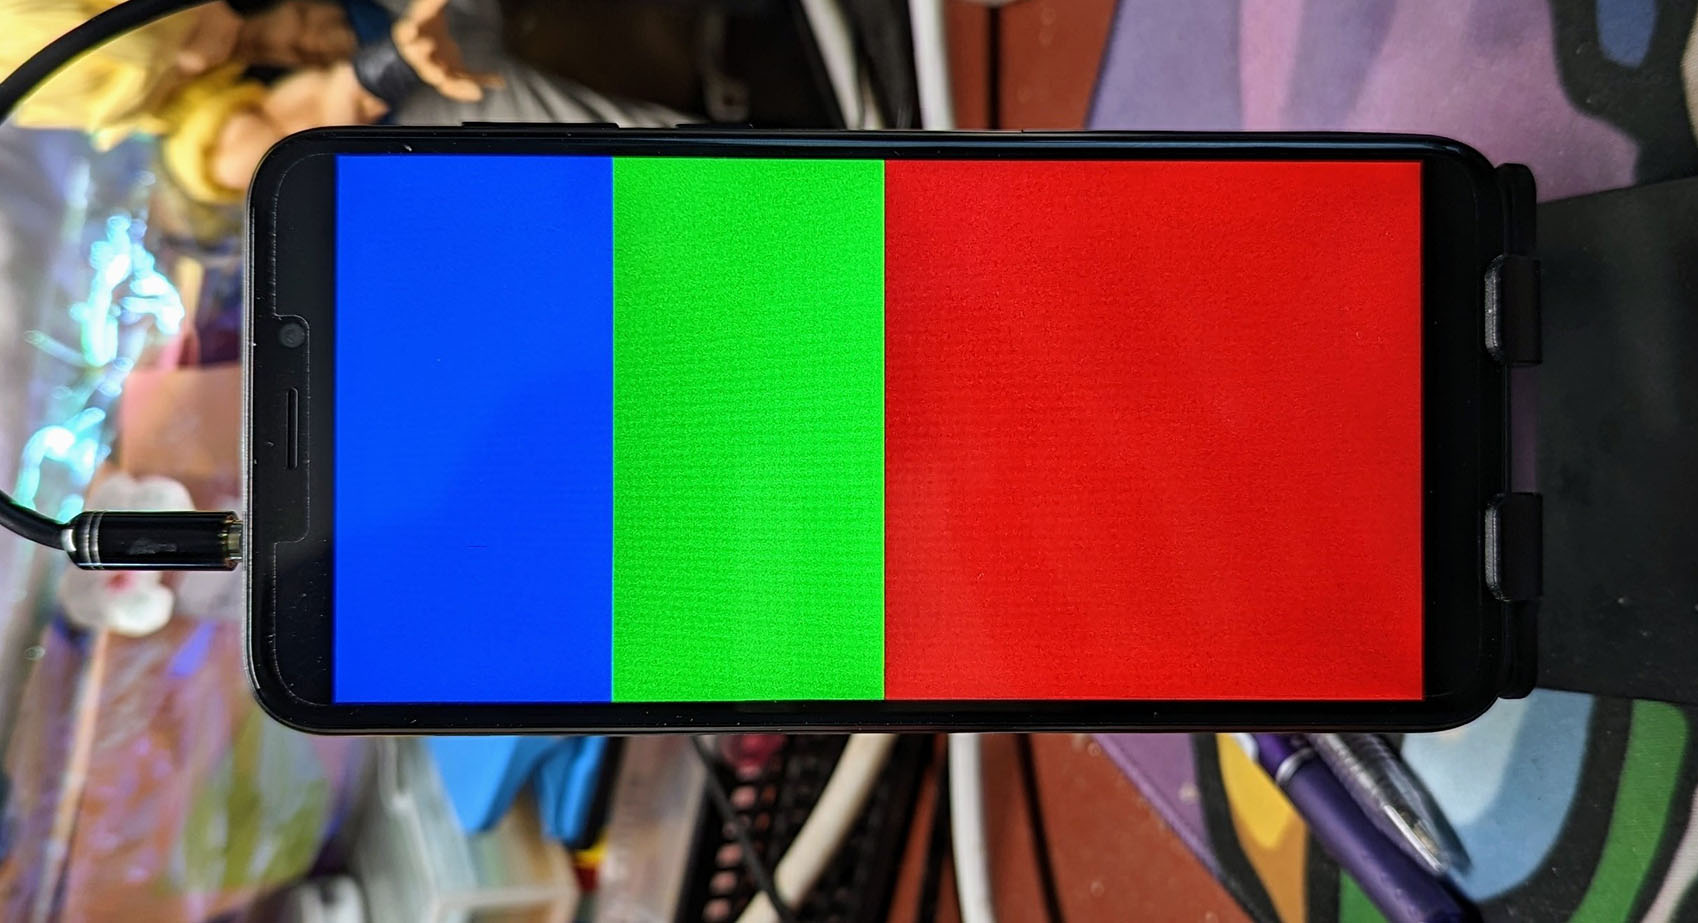
This is how we render the Blue, Green and Red Blocks in the pic above: fb_main.c
// Fill framebuffer with Blue, Green and Red Blocks
uint32_t *fb = fbmem;  // Access framebuffer as 32-bit pixels
const size_t fblen = pinfo.fblen / 4;  // 4 bytes per pixel

// For every pixel...
for (int i = 0; i < fblen; i++) {

  // Colors are in ARGB 8888 format
  if (i < fblen / 4) {
    // Blue for top quarter.
    // RGB24_BLUE is 0x0000 00FF
    fb[i] = RGB24_BLUE;

  } else if (i < fblen / 2) {
    // Green for next quarter.
    // RGB24_GREEN is 0x0000 FF00
    fb[i] = RGB24_GREEN;

  } else {
    // Red for lower half.
    // RGB24_RED is 0x00FF 0000
    fb[i] = RGB24_RED;
  }
}

// Omitted: Refresh the display with ioctl(FBIO_UPDATE)
Everything is hunky dory for chunks of pixels! Let’s set individual pixels by row and column…
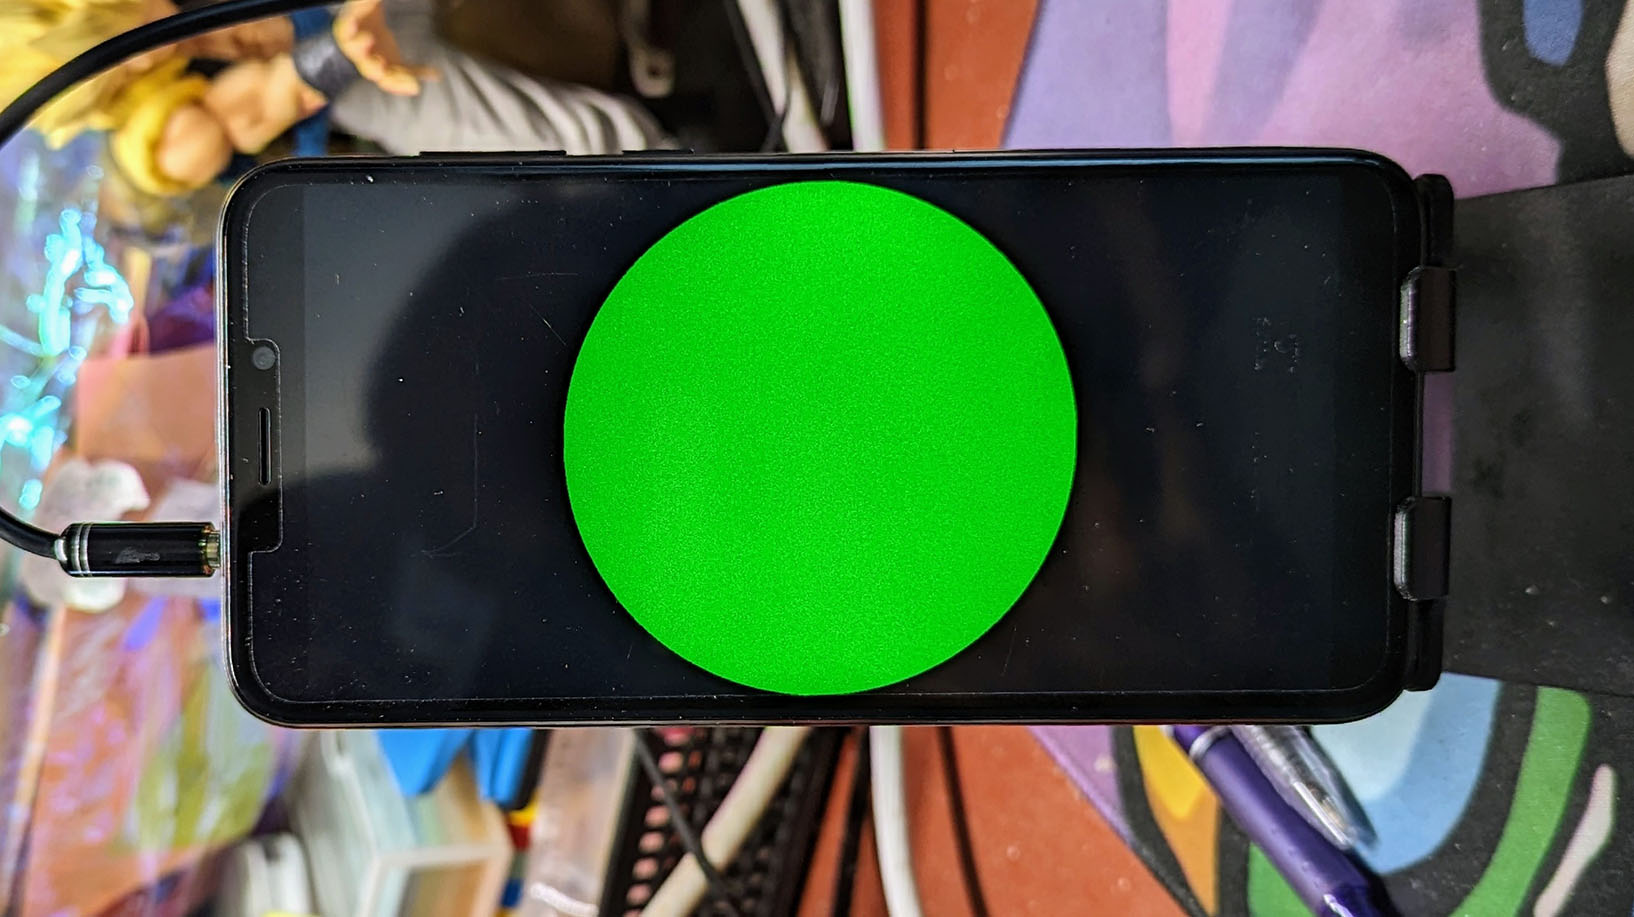
This is how we render the Green Circle in the pic above: fb_main.c
// Fill framebuffer with Green Circle
uint32_t *fb = fbmem;  // Access framebuffer as 32-bit pixels
const size_t fblen = pinfo.fblen / 4;  // 4 bytes per pixel

const int width  = pinfo.xres_virtual;  // Framebuffer Width
const int height = pinfo.yres_virtual;  // Framebuffer Height

// For every pixel row...
for (int y = 0; y < height; y++) {

  // For every pixel column...
  for (int x = 0; x < width; x++) {

    // Get pixel index
    const int p = (y * width) + x;

    // Shift coordinates so that centre of screen is (0,0)
    const int half_width  = width  / 2;
    const int half_height = height / 2;
    const int x_shift = x - half_width;
    const int y_shift = y - half_height;

    // If x^2 + y^2 < radius^2, set the pixel to Green.
    // Colors are in ARGB 8888 format.
    if (x_shift*x_shift + y_shift*y_shift <
        half_width*half_width) {
      // RGB24_GREEN is 0x0000 FF00
      fb[p] = RGB24_GREEN;

    } else {  // Otherwise set to Black
      // RGB24_BLACK is 0x0000 0000
      fb[p] = RGB24_BLACK;
    }
  }
}

// Omitted: Refresh the display with ioctl(FBIO_UPDATE)
Yep we have full control over every single pixel! Let’s wrap up our demo with some mesmerising rectangles…
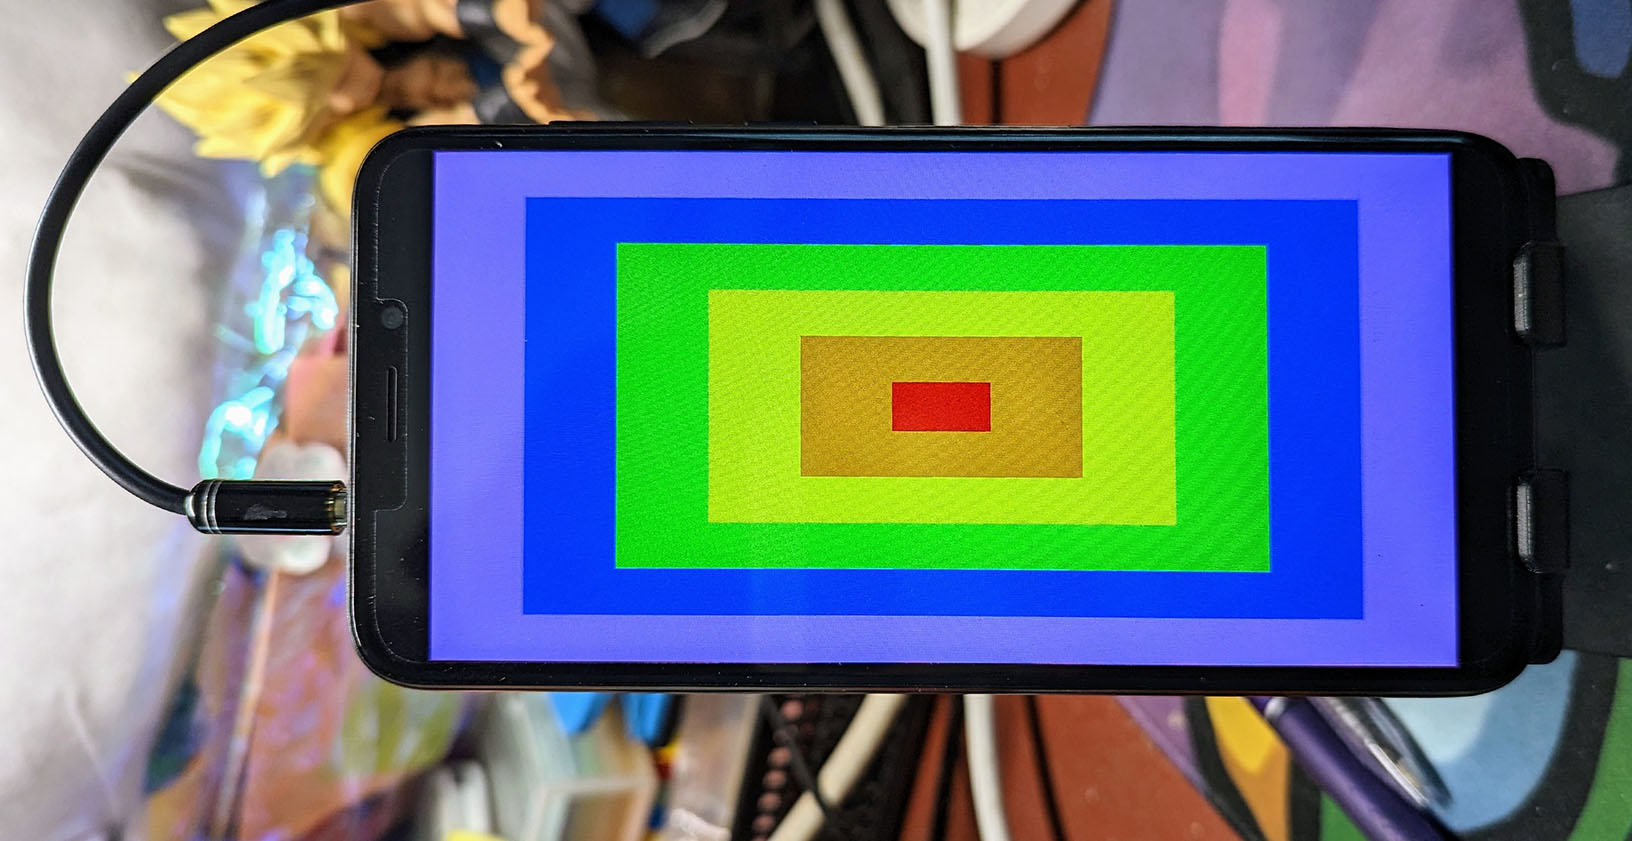
When we run the NuttX Framebuffer App, we’ll see a stack of Color Rectangles. (Pic above)
We render each Rectangle like so: fb_main.c
// Rectangle to be rendered
struct fb_area_s area = {
  .x = 0,  // X Offset
  .y = 0,  // Y Offset
  .w = pinfo.xres_virtual,  // Width
  .h = pinfo.yres_virtual   // Height
}

// Render the rectangle
draw_rect(&state, &area, color);

// Omitted: Refresh the display with ioctl(FBIO_UPDATE)The pic below shows the output of the Framebuffer App fb when we run it on PinePhone…

And we’re all done with Circles and Rectangles on PinePhone! Let’s talk about Graphical User Interfaces…
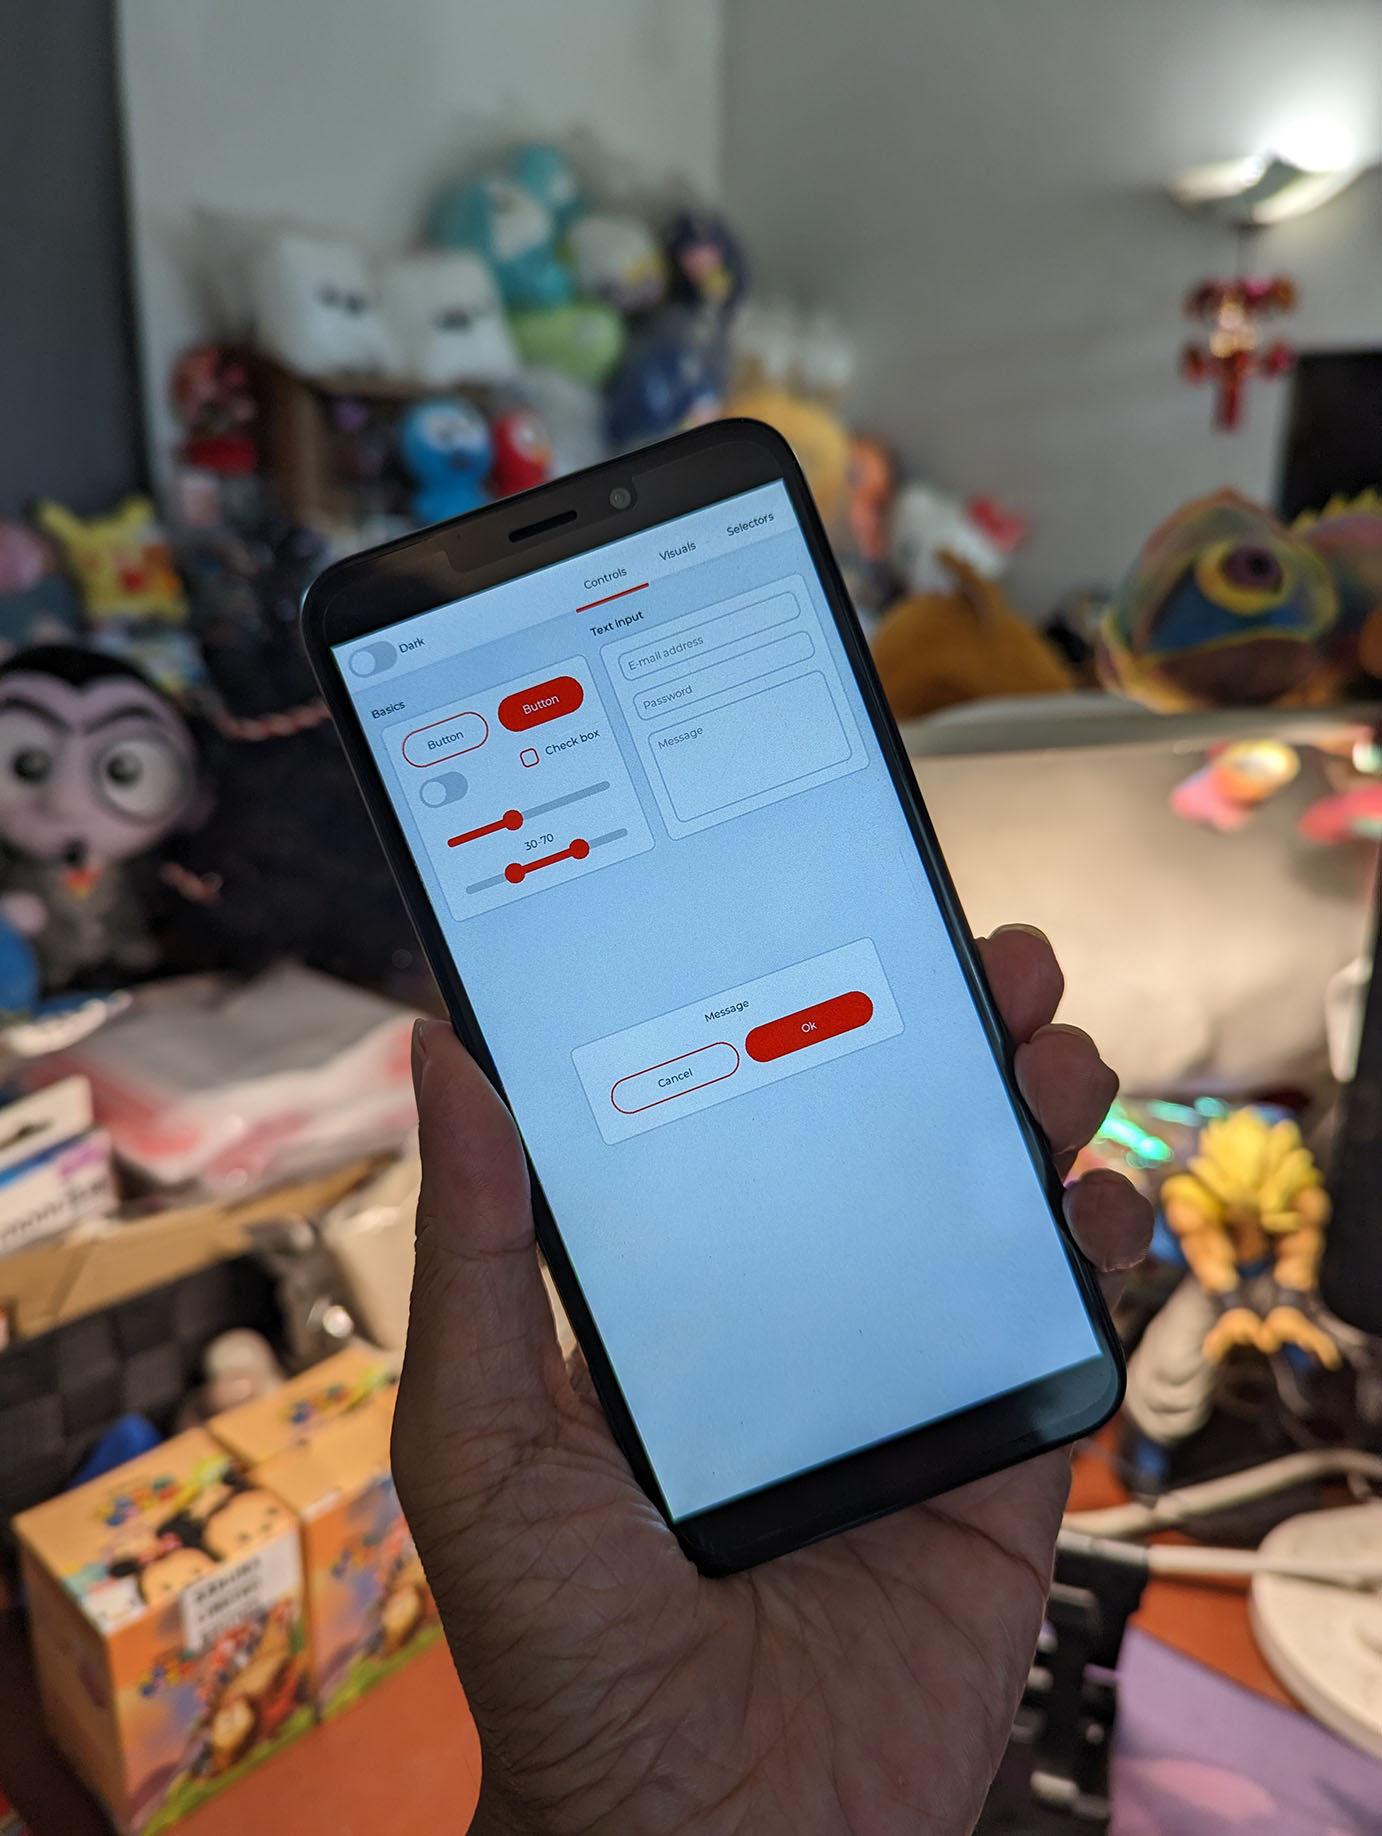
Rendering graphics pixel by pixel sounds tedious…
Is there a simpler way to render Graphical User Interfaces?
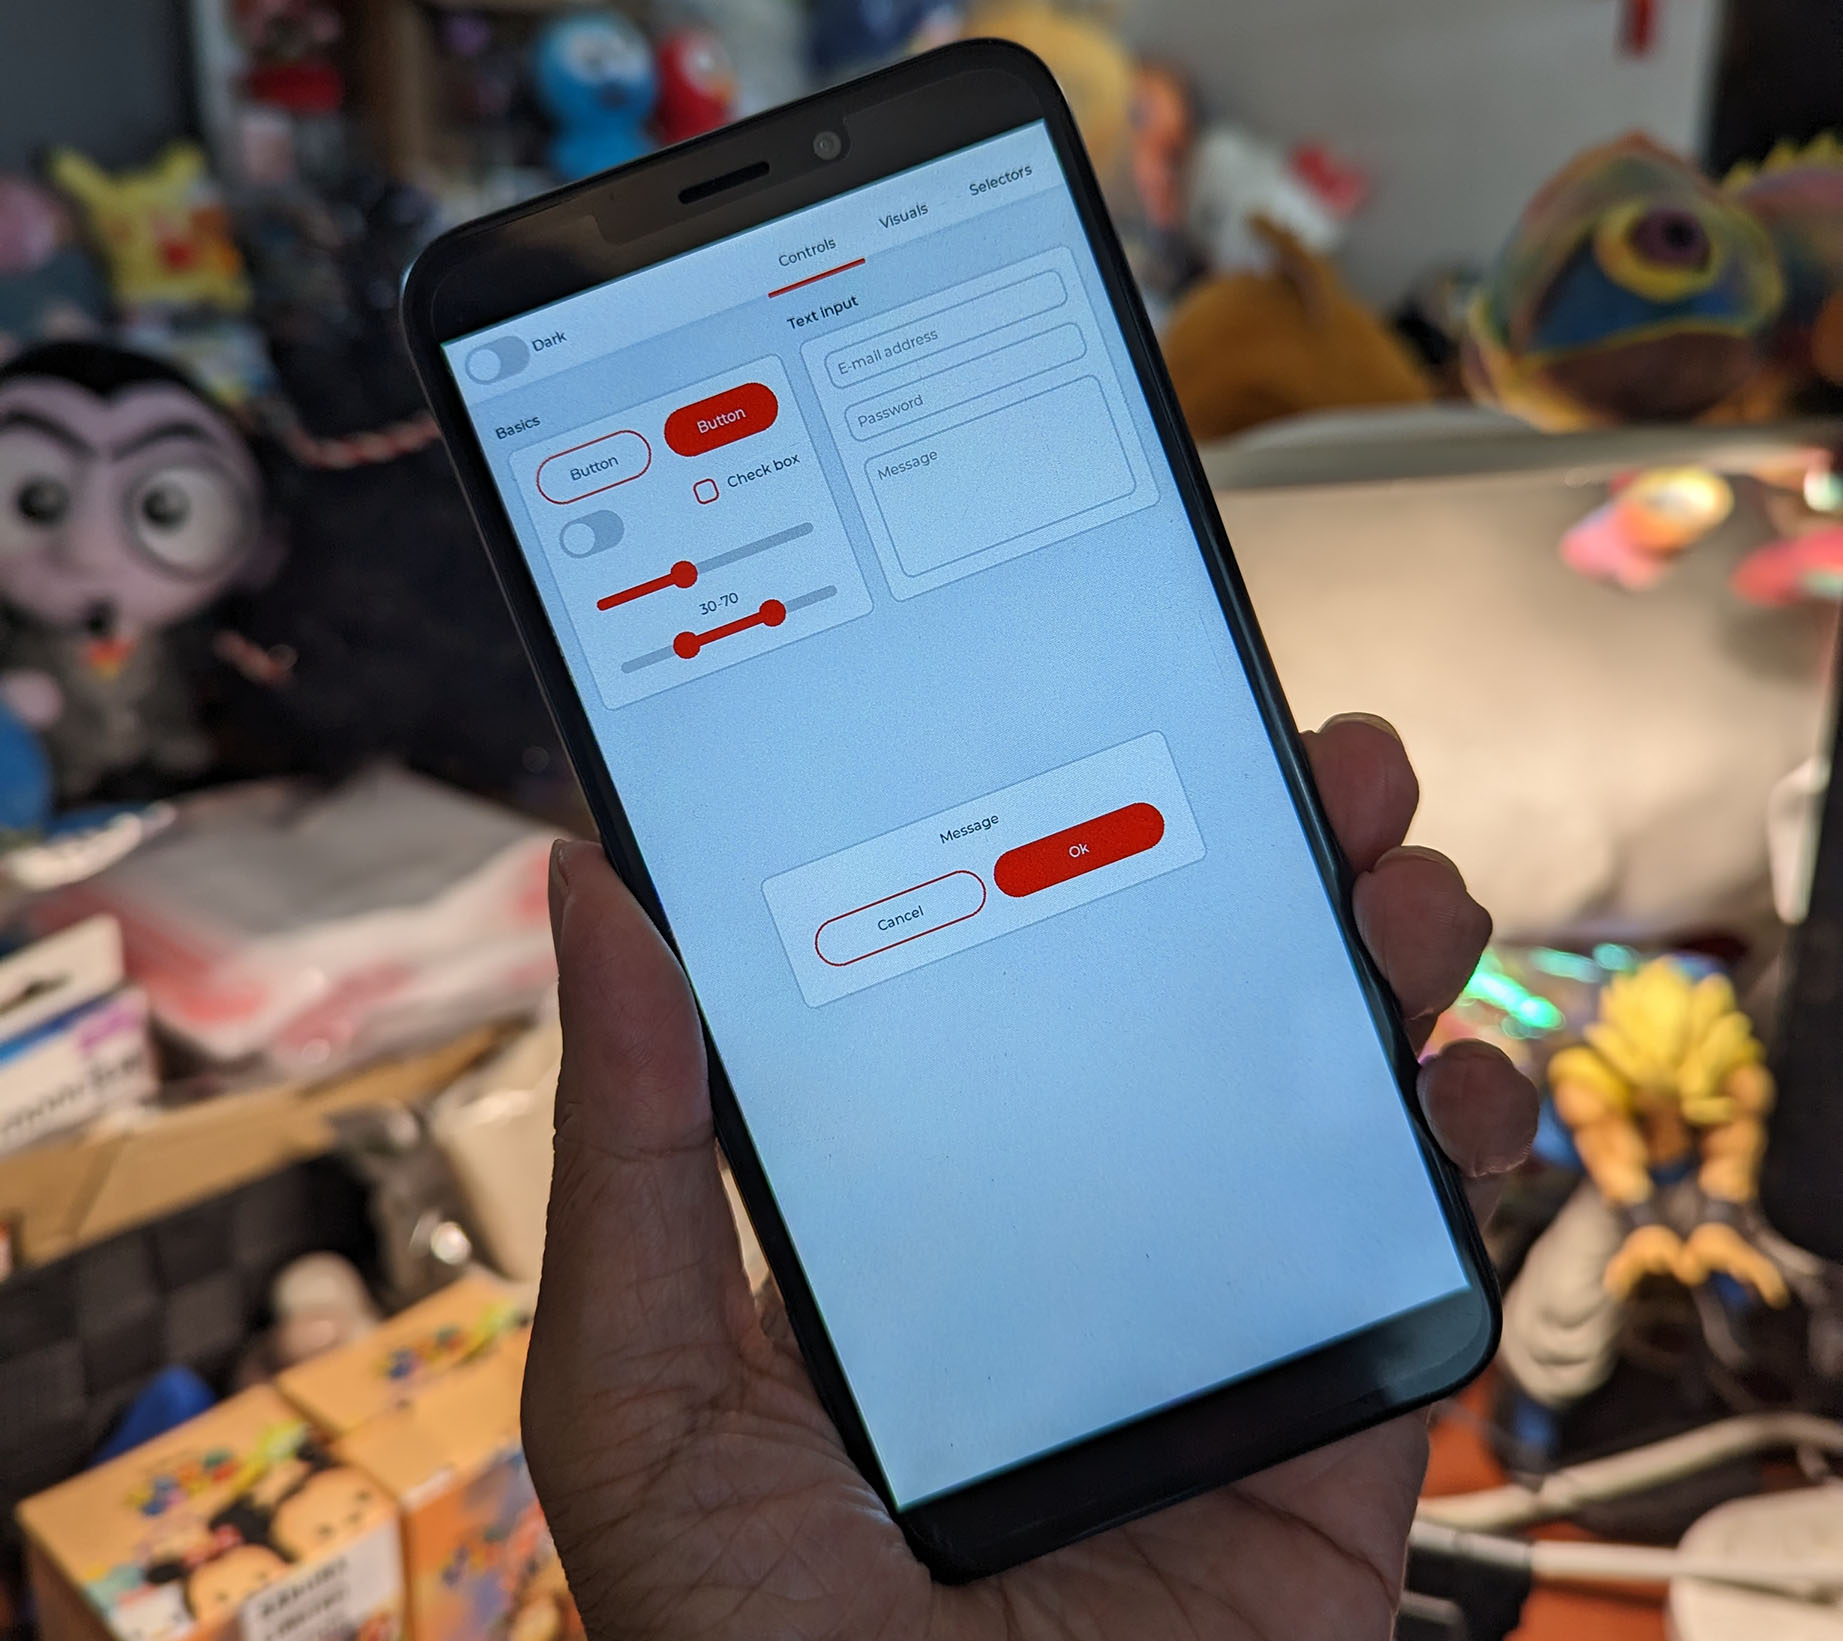
Yep just call the LVGL Graphics Library! (Pic above)
To build the LVGL Demo App on NuttX…
make menuconfigSelect these options…
Enable “Application Configuration > Graphics Support > Light and Versatile Graphics Library (LVGL)”
Enable “LVGL > Enable Framebuffer Port”
Browse into “LVGL > LVGL Configuration”
In “Color Settings”
Set Color Depth to “32: ARGB8888”
In “Memory settings”
Set Size of Memory to 64
In “HAL Settings”
Set Default Dots Per Inch to 250
In “Demos”
Enable “Show Some Widgets”
Enable “Application Configuration > Examples > LVGL Demo”
Save the configuration and exit menuconfig. Rebuild NuttX…
makeBoot NuttX on PinePhone. At the NSH Command Prompt, enter…
lvgldemo widgetsAnd we’ll see the LVGL Graphical User Interface on PinePhone! (Like this)
But it won’t respond to our touch right?
Yeah we haven’t started on the I2C Touch Input Driver for PinePhone.
Maybe someday LVGL Touchscreen Apps will run OK on PinePhone!
What’s inside the LVGL App?
Here’s how it works…
Main Function (Event Loop) of the LVGL App is here: lvgldemo.c
Main Function calls the NuttX Framebuffer Interface defined here: fbdev.c
LVGL Widgets are created here: lv_demo_widgets.c
LVGL Version supported by NuttX is 8.3.3 (See this)
Now we talk about the internals of our Framebuffer Driver…
We’ve seen the Framebuffer Interface for NuttX Apps…
What’s inside the Framebuffer Driver for PinePhone?
Let’s talk about the internals of our Framebuffer Driver for PinePhone…
RAM Framebuffer that’s mapped to the LCD Display over Direct Memory Access (DMA)
How our Framebuffer Driver is started by NuttX Kernel
Framebuffer Operations exposed by our driver
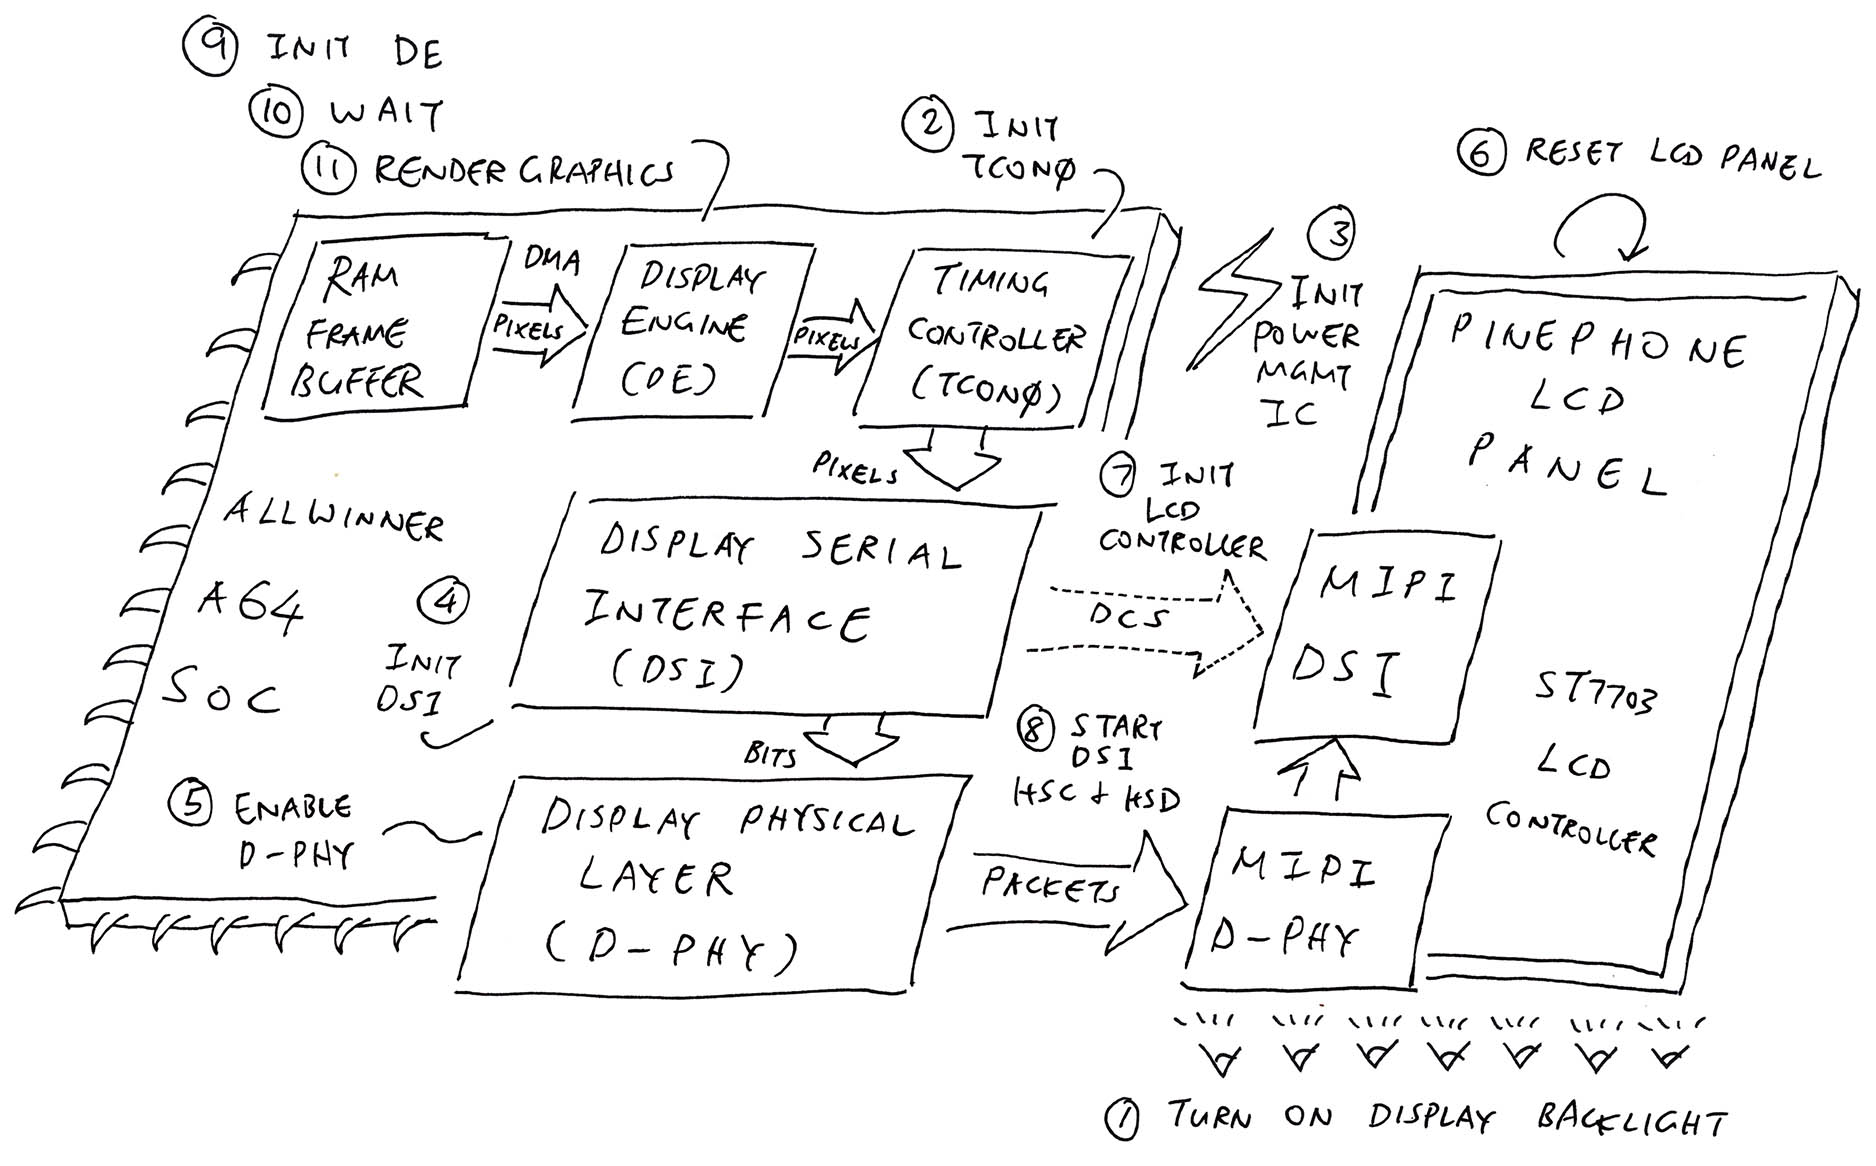
Complete Display Driver for PinePhone
Inside PinePhone’s Allwinner A64 SoC are the Display Engine and Timing Controller TCON0. (Pic above)
Display Engine and TCON0 will blast pixels from the RAM Framebuffer to the LCD Display, over Direct Memory Access (DMA).
(More about Display Engine and TCON0)
Here’s our RAM Framebuffer: pinephone_display.c
// Frame Buffer for Display Engine
// Fullscreen 720 x 1440 (4 bytes per XRGB 8888 pixel)
// PANEL_WIDTH is 720
// PANEL_HEIGHT is 1440
static uint32_t g_pinephone_fb0[  // 32 bits per pixel
  PANEL_WIDTH * PANEL_HEIGHT      // 720 x 1440 pixels
];
(Memory Protection is not turned on yet, so mmap returns the actual address of g_pinephone_fb0 to NuttX Apps for rendering)
We describe PinePhone’s LCD Display like so (pic below)…
// Video Info for PinePhone
// (Framebuffer Characteristics)
// PANEL_WIDTH is 720
// PANEL_HEIGHT is 1440
static struct fb_videoinfo_s g_pinephone_video = {
  .fmt       = FB_FMT_RGBA32,  // Pixel format (XRGB 8888)
  .xres      = PANEL_WIDTH,    // Horizontal resolution in pixel columns
  .yres      = PANEL_HEIGHT,   // Vertical resolution in pixel rows
  .nplanes   = 1,  // Color planes: Base UI Channel
  .noverlays = 2   // Overlays: 2 Overlay UI Channels
};(fb_videoinfo_s is defined here)
(We’re still working on the Overlays)
We tell NuttX about our RAM Framebuffer with this Plane Info…
// Color Plane for Base UI Channel:
// Fullscreen 720 x 1440 (4 bytes per XRGB 8888 pixel)
static struct fb_planeinfo_s g_pinephone_plane = {
  .fbmem        = &g_pinephone_fb0,         // Framebuffer Address
  .fblen        = sizeof(g_pinephone_fb0),  // Framebuffer Size
  .stride       = PANEL_WIDTH * 4,  // Length of a line (4-byte pixel)
  .display      = 0,   // Display number (Unused)
  .bpp          = 32,  // Bits per pixel (XRGB 8888)
  .xres_virtual = PANEL_WIDTH,   // Virtual Horizontal resolution
  .yres_virtual = PANEL_HEIGHT,  // Virtual Vertical resolution
  .xoffset      = 0,  // X Offset from virtual to visible
  .yoffset      = 0   // Y Offset from virtual to visible
};(fb_planeinfo_s is defined here)

Our Framebuffer Driver supports these Framebuffer Operations: pinephone_display.c
// Vtable for Frame Buffer Operations
static struct fb_vtable_s g_pinephone_vtable = {

  // Basic Framebuffer Operations
  .getvideoinfo    = pinephone_getvideoinfo,
  .getplaneinfo    = pinephone_getplaneinfo,
  .updatearea      = pinephone_updatearea,

  // TODO: Framebuffer Overlay Operations
  .getoverlayinfo  = pinephone_getoverlayinfo,
  .settransp       = pinephone_settransp,
  .setchromakey    = pinephone_setchromakey,
  .setcolor        = pinephone_setcolor,
  .setblank        = pinephone_setblank,
  .setarea         = pinephone_setarea
};
We haven’t implemented the Overlays, so let’s talk about the first 3 operations…
Get Video Info
Get Plane Info
Update Area
But before that we need to initialise the Framebuffer and return the Video Plane…
At Startup, NuttX Kernel calls up_fbinitialize to initialize the Framebuffer…
up_fbinitialize comes from our Framebuffer Driver (LCD Driver)…
up_fbinitialize (Initialise Framebuffer)
(Called by fb_register and pinephone_bringup)
Then NuttX Kernel interrogates our Framebuffer Driver…
NuttX Kernel calls our Framebuffer Driver to discover the Framebuffer Operations supported by our driver.
This is how we return the Framebuffer Operations: pinephone_display.c
// Get the Framebuffer Object for the supported operations
struct fb_vtable_s *up_fbgetvplane(
  int display,  // Display Number should be 0
  int vplane    // Video Plane should be 0
) {
  // Return the supported Framebuffer Operations
  return &g_pinephone_vtable;
}
(We’ve seen g_pinephone_vtable earlier)
Now it gets interesting: NuttX Kernel and NuttX Apps will call the operations exposed by our Framebuffer Driver…
Remember FBIOGET_VIDEOINFO for fetching the Framebuffer Characteristics?
The first operation exposed by our Framebuffer Driver returns the Video Info that contains our Framebuffer Characteristics: pinephone_display.c
// Get the Video Info for our Framebuffer
// (ioctl Entrypoint: FBIOGET_VIDEOINFO)
static int pinephone_getvideoinfo(
  struct fb_vtable_s *vtable,   // Framebuffer Driver
  struct fb_videoinfo_s *vinfo  // Returned Video Info
) {
  // Copy and return the Video Info
  memcpy(vinfo, &g_pinephone_video, sizeof(struct fb_videoinfo_s));

  // Keep track of the stages during startup:
  // Stage 0: Initialize driver at startup
  // Stage 1: First call by apps
  // Stage 2: Subsequent calls by apps
  // We erase the framebuffers at stages 0 and 1. This allows the
  // Test Pattern to be displayed for as long as possible before erasure.
  static int stage = 0;
  if (stage < 2) {
    stage++;
    memset(g_pinephone_fb0, 0, sizeof(g_pinephone_fb0));
    memset(g_pinephone_fb1, 0, sizeof(g_pinephone_fb1));
    memset(g_pinephone_fb2, 0, sizeof(g_pinephone_fb2));
  }
  return OK;
}
(We’ve seen g_pinephone_video earlier)
This code looks interesting: We’re trying to show the Startup Test Pattern for as long as possible. (Pic above)
Normally NuttX Kernel will erase our Framebuffer at startup. But with the logic above, our Test Pattern will be visible until the first app call to our Framebuffer Driver.
(Test Pattern is rendered by pinephone_display_test_pattern)
(Which is called by pinephone_bringup at startup)
Earlier we’ve seen FBIOGET_PLANEINFO that fetches the RAM Framebuffer…
This is how we return the Plane Info that describes the RAM Framebuffer: pinephone_display.c
// Get the Plane Info for our Framebuffer
// (ioctl Entrypoint: FBIOGET_PLANEINFO)
static int pinephone_getplaneinfo(
  struct fb_vtable_s *vtable,   // Framebuffer Driver
  int planeno,  // Plane Number should be 0
  struct fb_planeinfo_s *pinfo  // Returned Plane Info
) {
  // Copy and return the Plane Info
  memcpy(pinfo, &g_pinephone_plane, sizeof(struct fb_planeinfo_s));
  return OK;
}
(We’ve seen g_pinephone_plane earlier)
The final operation updates the display when there’s a change to the Framebuffer: pinephone_display.c
// Update the Display when there is a change to the Framebuffer
// (ioctl Entrypoint: FBIO_UPDATE)
static int pinephone_updatearea(
  struct fb_vtable_s *vtable,   // Framebuffer Driver
  const struct fb_area_s *area  // Updated area of Framebuffer
) {
  // Mystery Code...
This operation is invoked when NuttX Apps call FBIO_UPDATE, as we’ve seen earlier…
The code inside looks totally baffling, but first let’s talk about a mysterious rendering problem…
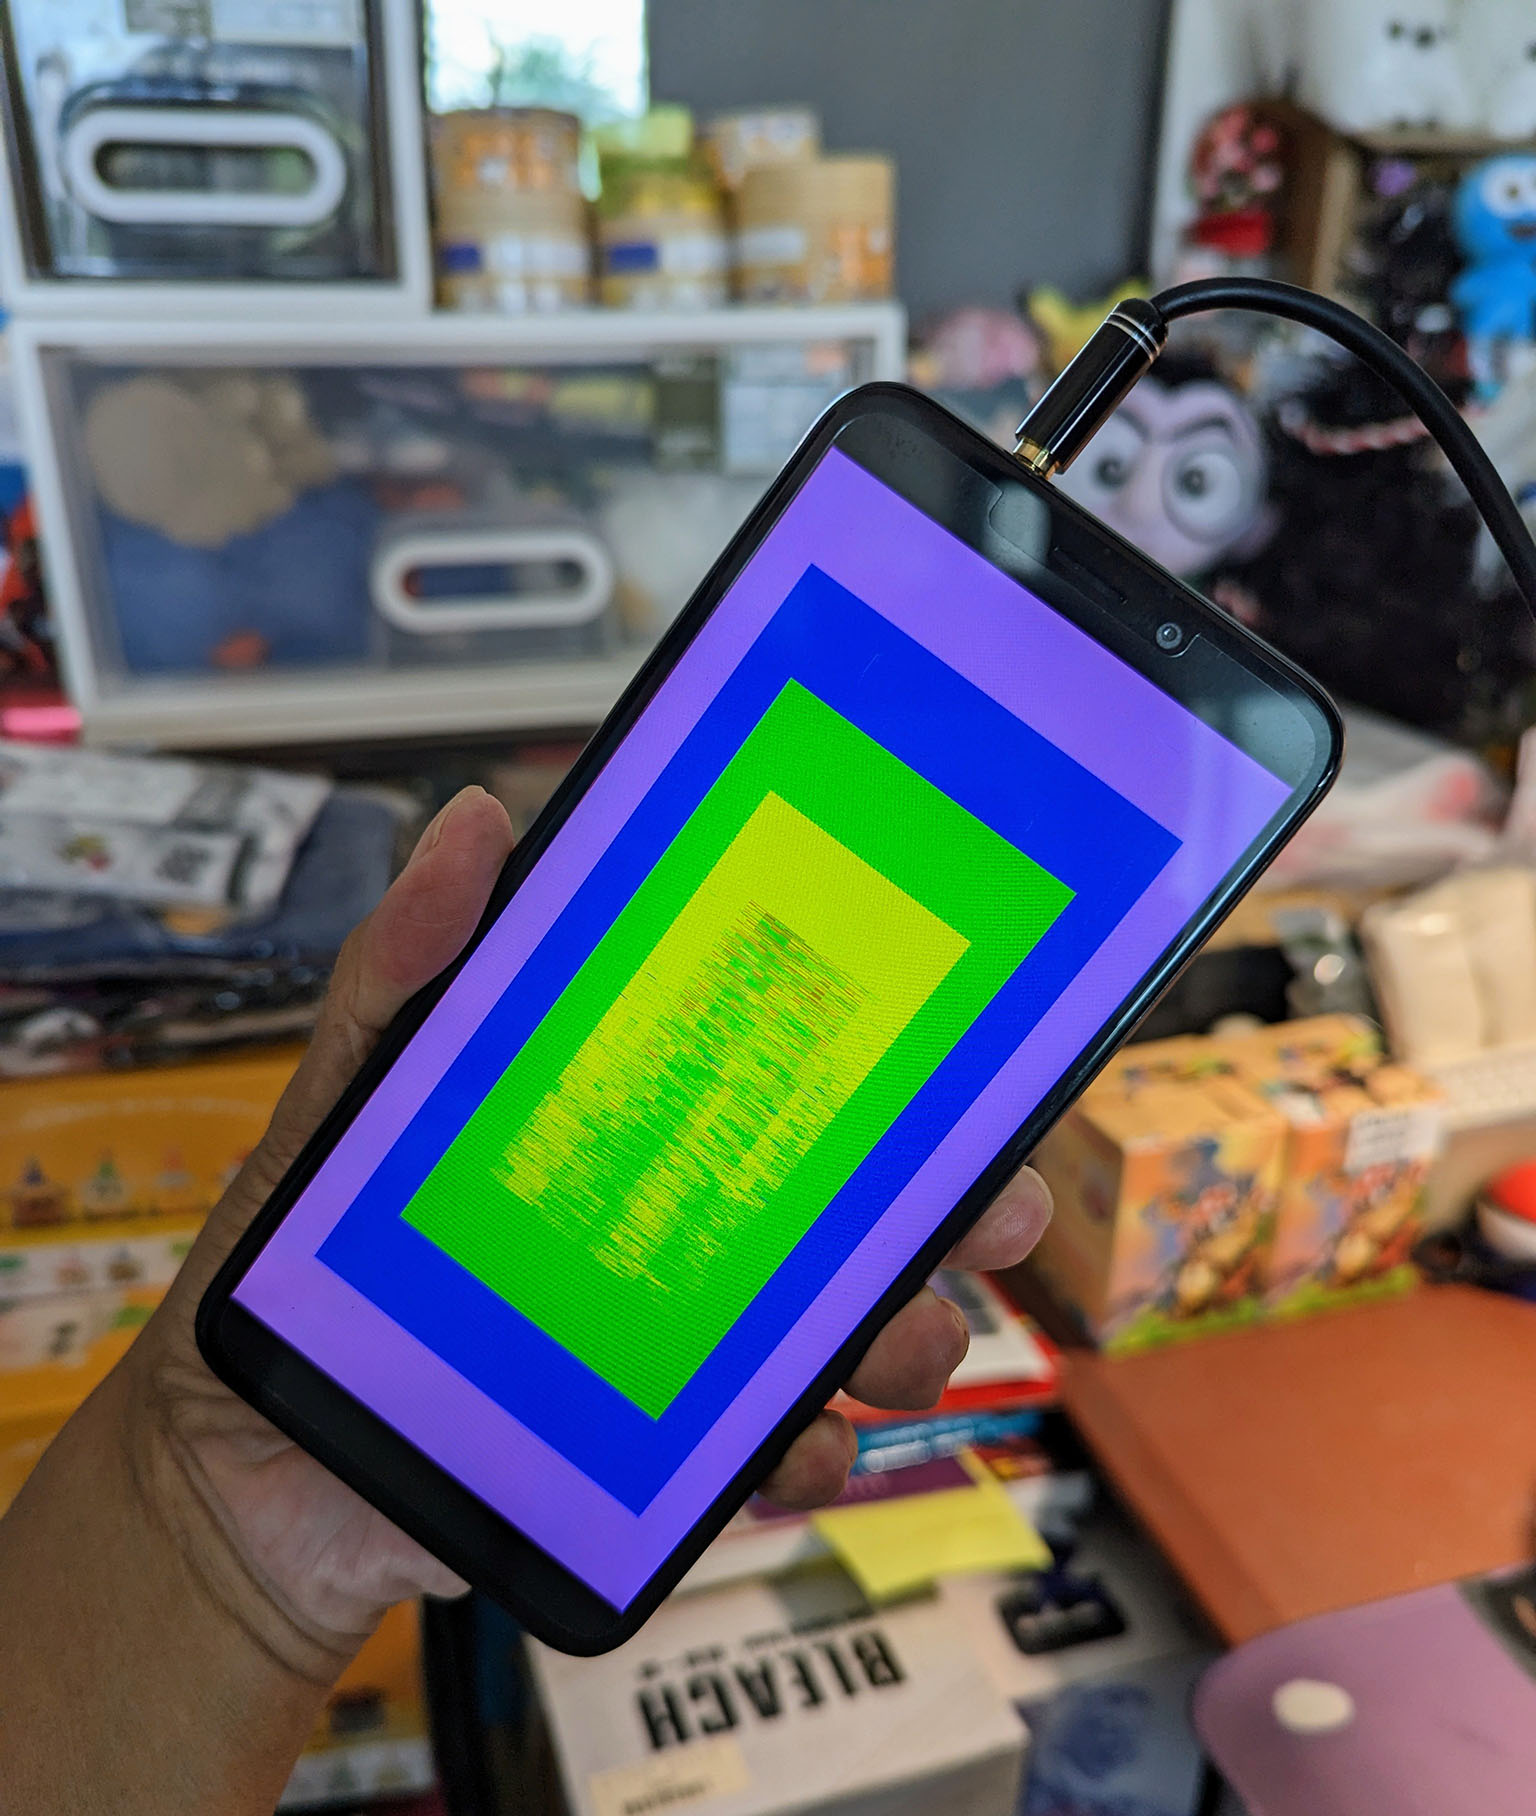
When we tested our Framebuffer Driver for the very first time, we discovered missing pixels in the rendered image (pic above)…
Inside the Yellow Box is supposed to be an Orange Box
Inside the Orange Box is supposed to be a Red Box
We see bits of Orange and Red Pixels
Maybe we didn’t render the pixels correctly?
Or maybe the RAM Framebuffer got corrupted?
When we slowed down the rendering, we see the missing pixels magically appear later in a curious pattern…
According to the video, the pixels are actually written correctly to the RAM Framebuffer.
But the pixels at the lower half don’t get pushed to the display until the next screen update.
Maybe it’s a problem with Framebuffer DMA / Display Engine / Timing Controller TCON0?
Yeah there seems to be a lag between the writing of pixels to RAM Framebuffer, and the pushing of pixels to the display over DMA / Display Engine / Timing Controller TCON0.
We found an unsatisfactory workaround for the lag in rendering pixels…

In the previous section we saw that there was a lag pushing pixels from the RAM Framebuffer to the PinePhone Display.
(Over DMA / Display Engine / Timing Controller TCON0)
Can we overcome this lag by copying the RAM Framebuffer to itself, forcing the display to refresh?
This sounds very strange, but yes it works!
From pinephone_display.c:
// Update the Display when there is a change to the Framebuffer
// (ioctl Entrypoint: FBIO_UPDATE)
static int pinephone_updatearea(
  struct fb_vtable_s *vtable,   // Framebuffer Driver
  const struct fb_area_s *area  // Updated area of framebuffer
) {
  // Access Framebuffer as bytes
  uint8_t *fb = (uint8_t *)g_pinephone_fb0;
  const size_t fbsize = sizeof(g_pinephone_fb0);

  // Copy the Entire Framebuffer to itself,
  // to fix the missing pixels.
  // Not sure why this works.
  for (int i = 0; i < fbsize; i++) {

    // Declare as volatile to prevent compiler optimization
    volatile uint8_t v = fb[i];
    fb[i] = v;
  }
  return OK;
}
With the code above, the Red, Orange and Yellow Boxes are now rendered correctly in our NuttX Framebuffer Driver for PinePhone. (Pic above)
Instead of copying the entire RAM Framebuffer, can we copy only the updated screen area?
Yep probably, we need more rigourous testing.
But how do we really fix this?
We need to flush the CPU Cache, and verify that our Framebuffer has been mapped with the right attributes.
(Thanks to Barry Nolte, Victor Suarez Rovere and crzwdjk for the tips!)
(Commenters on Hacker News also think it’s a CPU Cache issue)
Who calls pinephone_updatearea?
After writing the pixels to the RAM Framebuffer, NuttX Apps will call ioctl(FBIO_UPDATE) to update the display.
This triggers pinephone_updatearea in our NuttX Framebuffer Driver: fb_main.c
// Omitted: NuttX App writes pixels to RAM Framebuffer

// Update the Framebuffer
#ifdef CONFIG_FB_UPDATE
  ret = ioctl(    // I/O Control
    state->fd,    // File Descriptor for Framebuffer Driver
    FBIO_UPDATE,  // Update the Framebuffer
    (unsigned long)((uintptr_t)area)  // Updated area
  );
#endif
How do other PinePhone operating systems handle this?
See this…
Now that we can render Graphical User Interfaces with LVGL Graphics Library… It’s time to build the NuttX Touch Input Driver for PinePhone!
The NuttX Community is now adding support for I2C on Allwinner A64 SoC, which will be super helpful for our I2C Touch Input Driver. Stay Tuned!
Please check out the other articles on NuttX for PinePhone…
Many Thanks to my GitHub Sponsors for supporting my work! This article wouldn’t have been possible without your support.
Got a question, comment or suggestion? Create an Issue or submit a Pull Request here…